
Not thinking before crossing any deep water crossing can cost you plenty. Here are a few tips that will avoid disaster and expensive repair.
There is no doubt that negotiating a water crossing is exciting and on most offroader’s bucket list. It’s where a well thought out plan and a properly set up 4X4 is important for a successful outcome.
You can break down water crossing into three parts; Preparation, The Crossing and Checking after Exiting, and the overwhelming goal is to ensure the safety of your passengers, vehicle and the environment.
PREPARING YOUR 4X4
Most modern 4X4s come with a list of specifications and statistics that are as long as your arm. In the case of water crossings (for a stock 4X4), you’re looking for the recommended wading depth.
This is the manufacturer’s limit of the maximum depth that the vehicle can safely cross still water with a flat bottom. Surprisingly this figure can vary considerably. For example, the Ford Ranger and Everest have an impressive 800mm, followed closely by vehicles such as the current Toyota Hilux and Fortuner with 750mm. The Jeep Wrangler is 650mm while surprising most of the Land Rovers, have an amazing range of 800-900mm, though the Defender is just 500mm. So best to check your vehicle’s wading depth before venturing out. The wading depth is sometimes determined by the height of the air intake, other times by the height of the electronics.
For most owners, with care these wading depths are quite satisfactory for shallow crossings but there are a few more things that you can do to ensure a safer traverse for deeper or more challenging water. These wading depths are not enough if you intend to journey into areas such as mountainous terrain where rivers can be quite deep and fast flowing. So preparing your 4X4 is paramount before you cross.
Your 4X4 has three features that need attention when it comes to protecting your vehicle from water.
The Engine Air Intake:
The obvious danger to any engine is water ingress because the engine is designed to compress gasses and not liquids such as water which is incompressible. So know where your engine takes its air from. 4X4s come in all sorts of designs and the location of the air intake can vary. You could find the air intake under the bonnet like some Jeeps, some inside the wheel arch like many Toyotas while others simply face forward behind the bonnet latch like Pajero, which frankly is asking for trouble.
So have a look around to see where your motor takes in that valuable air. This will help how best to protect your engine from sucking in water. It only takes a few millilitres to enter the engine to result in irreparable damage to internal components. It can result in total immobilisation, a wrecked engine and a big hit to your hip pocket – modern engines can be over $20k to replace or repair.

There are a few things you can do to minimise the impacts of water crossings, especially if you think you may be contending with a lot of water crossings. The fitting of a quality snorkel is the obvious first step in protecting your motor from water. A well designed snorkel will draw clean air from higher up near the top of the windscreen. I say well designed as it’s not as simple as bolting on the snorkel and all is 100% guaranteed. Many snorkels, especially factory supplied ones, for example those fitted standard with Toyota’s 70 series Ute are of a two piece design that are often not fully sealed along their full length and known as a RAI, or Raised Air Intake.
So where the snorkel has joins use some mastic or equivalent sealant (as it needs to be flexible and doesn’t interfere with sensors) to ensure the snorkel’s integrity. Don’t forget the air box as most have drain holes, some being fitted with a one way valve design while others simply just a few small holes. There is a little contention about drain holes. I think best to leave them open if no snorkel is fitted to allow water to drain if you just get a small splash but of course it can be negative to do so if submerged for extended periods. I suggest seal them if you have a snorkel fitted to ensure an air tight seal. It’s also a good time to temporarily undo any clamps and pipes along the air system, clean them up and redo to ensure a tight and closed system.
To maximise protection of your valuable asset carry a water blind. Placing a blind in front of the 4WD reduces water ingress under your bonnet, helps protect the electrical looms and is an effective and cost efficient means when no snorkel is available for your model or you wish to add another level of protection.
A water blind setup can be as simple as a $20 poly tarp and a few bungee cords sourced from your local hardware store. The good thing is that a tarp has multiple usages and takes little room. If you prefer, there are commercial variants for under the $150 mark that are contoured to fit most 4X4 and can accommodate those fitted with bull bars. Many home-made blinds have come off mid-stream, and the commercial blinds tend to have snatch strap carriers built-in.

Simply wrap and tuck them around the front of your 4WD with the appropriate straps but make sure your tyres and steering components are free to move through their full range.
It should be removed promptly after completing your water crossing as it can starve the engine of air flow for cooling.
The Electrical System:
Many modern 4WD have some defence against water affecting the engine, meaning that the electrics can contend with moderate exposure to water due to the use of water proofed plugs, connectors and modern cabling practices. Regardless, it’s recommended that all the electrics found under your bonnet need attention, more so if you have an older style 4WD that may still use basic systems like distributors and leads, which dislike even a little moisture. For those with older models, tightly covering your distributor/coils with a thick plastic bag enhances survival of your 4WD through a water crossing.
Even though I have a modern 4WD, before I enter a challenging crossing and wish to minimise risk, I spray water dispersant such as WD40 on vital components which will help minimise water affecting my electrical system and spoiling my day.

As I have a Jeep Wrangler with removable doors I also lightly spray WD40 around door rubbers. It minimises or at least slows down any water ingress to help keep the interior a little drier. I find this to be quite effective as with many other 4WDs, door sealing isn’t 100% guaranteed.
Drive-line components:
My final suggestion is to consider your air breathers for water crossings. All 4WDs have multiple air breather tubes fitted to various sections of the driveline. These usually comprise of rubber tubes attached to these components to allow air to expand and contract as the temperature fluctuates during log hot drives or the undercarriage enters a cold environment like water for example. It’s designed so as to have air flowing in and out rather than fluids forced out of seals. There are ones fitted to each axle/differentials (and possibly the centre differential for constant 4WD equipped vehicles), the transfer case and the gear box.


The last thing you want is to hit cold water and have the breather suck air in along with water as the axle/differentials cools rapidly. Water and oil just don’t mix and could cause damage to your gearing and internal components within due to deterioration of lubrication. You’d be amazed to know that many 4WDs have quite short air breather tubes; some can be only a few inches long, begging to suck in more than just air in even at moderate water depths.
In my case Jeep had addressed the transfer case and gear box by having them routed quite high into the engine bay. The differential breathers on the other hand were terminated just shy of the top of the tyres. So fitting longer breather tubes to my axles was one of my first and easiest modifications. There are commercial breather kits like a 2 port kit starting from around $40 and for a little more choose a 4 port kit to protects all components or do what I did and use 3/8” fuel line that can be purchased for a few dollars. Either way, it’s an easy and gratifying one hour DIY job.

The most common path is to route your tubes high into the engine bay or fuel filler void. Ensure they’re securely cable tied, tucked as high as possible away from any heat source or errant sticks but they still need to have enough slack as the axles move through the full range of articulation.
THE CROSSING
Before making that leap into the water, ask yourself:
- Must I cross this water at this point, including the exit?
- Am I comfortable and confident to do so successfully?
- Is the vehicle capable of crossing this stretch of water safely?
- Can I minimise the impact on the environment?
- Could I come back the other way if needs be?
If the answer is no then look at other options so you can proceed on your adventure.
If you do decide to go forth, then there are some points to be considered to ensure a safe crossing.
When confronting any unfamiliar body of water or water is to stop, make a hot brew and set in place a plan. This also allows your car to cool as far as possible, always a good idea before subjecting hot metal to cold water.
Where possible I confer with other 4WDers who may have recently crossed this stretch of water to get their opinions. Here’s what I look for:
- Focus on the depth across your intended path and map out the best path. Check for hidden holes or other hazards that could hinder your progress or cause vehicle damage including prevailing traction under foot. If water flow allows, placing markers/sticks along you path can help or if safe to do so, have a volunteer walk alongside your progress as a spotter.
- While walking a river, test the current and flow of the water. If you can’t stand unaided then your pride and joy will have a much bigger problem doing so. Naturally this isn’t always possible in the northern parts of Australia due to the crocodiles. This is where local knowledge comes in very handy.
 Some crossings are just too long to walk, so local knowledge is very handy
- Know where you will exit. It’s surprising to see many 4WDers only think of where they will get out once they’re committed. Ensure the exit is manageable as they can become quite slippery and rutted. Not all crossings are dead straight as exits can be found well upstream or downstream.
- Fast-flowing water is more likely to have a solid base than slow-flowing water, as slow-flowing water drops its sediment to create a soft bottom.
- Once you feel committed and all is in place, I suggest for an automatic 4WD to select low range and either leave it in drive or where fitted choose 2nd gear. For manual transmission 2nd gear low-range is best not 1st, so as to maintain smooth momentum throughout the traverse and do not depress your clutch as water can enter seals as the mechanism moves rendering your transmission inoperable. Some modern 4WDs like Land Rover and Jeeps have “terrain select” options, so become familiar with the choices best suited for water crossing which is dictated by the underlying terrain. Avoid snow/gravel modes as they deaden the throttle response. Raise air suspension if applicable.

Some modern 4WDs like Jeep have Terrain Select and Air Suspension to aid with clearance during water crossings - You will need to progressively increase the throttle as you enter the water because of the massive resistance of the water. This is where you’ll notice the bow wave makes the water seem a lot deeper than it did when you were walking it!
- Smart 4WDers will have their rated recovery equipment (of course you do have your recovery equipment?) such as winch extension or snatch straps with shackles already connected and readily accessible in case things go awry. You don’t want to be connecting bits and pieces whilst half under water, it creates panic. Time is of the essence and you’ll be thankful for your well thought out recovery plan as it’s your best insurance in protecting your rig.
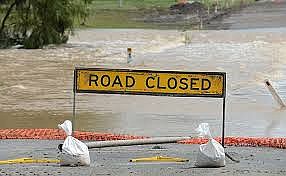
- Never, ever cross flood water, especially if it’s been signposted. You can also be subjected to a fine, even if the floodwater has subsided, the road may not to be safe to use. There is the increased risk of hidden hazards, holes or damaged infrastructure that could, halt your progress or worse wash your vehicle downstream.


Once in the water, depending on depth or challenging sections, I advocate a speed around fast walking pace. The aim is to minimise excessive splashing over the 4WD but where you are creating a smooth bow wave in front of your 4WD which lessens water entering the engine bay and/or being sucked up by your cooling fan (which can be detrimental for some models that have their fans mounted very close to the radiators). Maintain a steady and constant speed with minimal bursts of the accelerator or braking. The correct speed is dictated by the speed of the water relative to the vehicle, so when driving upstream you go slower than driving downstream.
CHECKING AFTER EXITING
If you have crossed successfully and it’s viable and safe to do so, wait a few moments close to the exit point which in most cases will have your 4WD still pointing upwards. This will allow most of the trapped water from your undercarriage to flow back into the body of water and minimises erosion to the exit.
Finally perform a visual check of your 4WD to ensure all is clear and there is no debris caught under your 4WD. As you depart place a few moments of light pressure on your brakes so they can dry up a little quicker.
By following these guidelines your next water crossing should be successful and worth a photo or two…but don’t get caught in that bow wave!


